
I recently had a non-domain joined edge Windows 2016 machine with two separate NICs that I needed to set different Windows Firewall settings to. Why? For instance, I wanted to allow RDP for the Internal NIC, and not allowing it for the External one, etc. The problem was, the NICs were set with the wrong network profile, the external public facing one was set to Private, and the other was reversed as shown in the following screen capture:

New with Windows Server 2012 and higher, to change the network profile, PowerShell v4 cmdlets need to be used! Those cmdlets are:
Get-NetConnectionProfile
Set-NetConnectionProfile
Here are the results with the “Get” command:
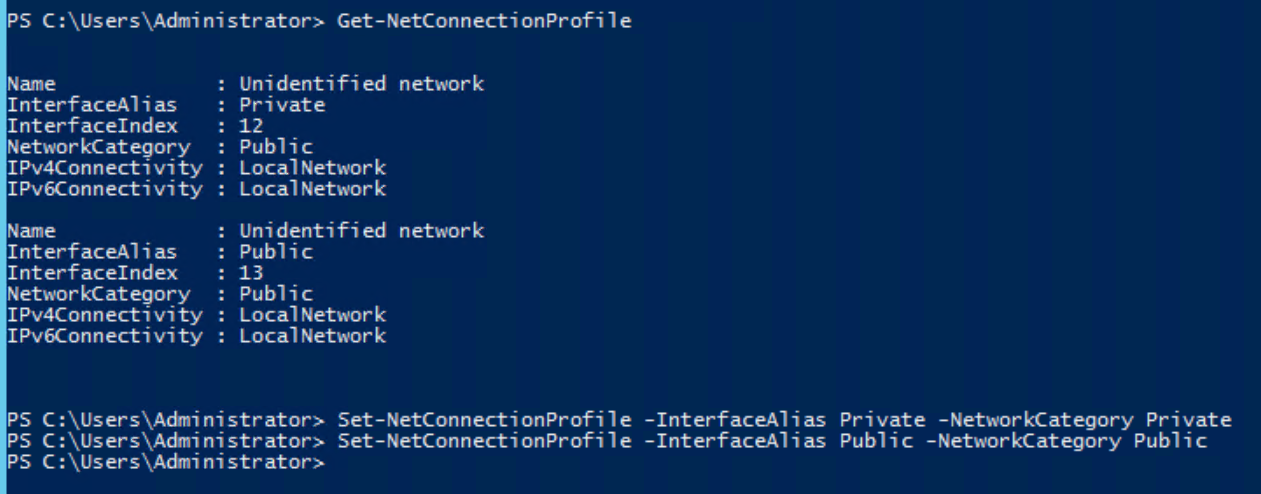
We can see the results are reversed, as the “Internet” connection has the “Private” designation, thus the wrong Windows Firewall profile is assigned to it.
To fix that, we run the “Set” command as shown in the bottom of the capture above, and the correct firewall profile is assigned!
Note: I named the external facing NIC “Public”, and the internal facing one “Private”. You can name it whatever you’d like, and identify it with the -InterfaceAlias property.

The default profile in Windows Server 2012+ is Public. It automatically changes when you join the server to the Domain. In my instance, I was not joining this server to a Domain, and thus had to set it manually, on top of that, in this instance, the automatic designation was configured incorrectly.